Tuesday, 15 December 2015

Soft Toy Pattern KARLA KITTEN


Karla Kitten soft toy

I realize I haven't posted any news or projects since July, oh how time fly's.
We have been travelling as we do most years this time to England and Europe, but no excuse as I have been home since October.


I always have new ideas fumbling and scrambling to get to the front of the queue and KARLA KITTEN has made it.


She really is a darling girl just like her namesake my Karla, a small dolly easily loved and carried around by a wee tot.


The minky fabric that I have used for her face, hands and feet is so soft and cuddly and the beautiful retro fabric that makes up the rest of her, simply wonderful.


Most of my fabric I got here at my local but the little prints I got  from America.


Like all my toys I fall for them as they come to life, I love the whole process, dreaming, making and photographing.
Meet KARLA KITTY .


Friday, 31 July 2015

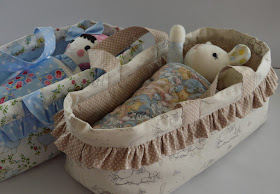
Carrycot Tutorial for SEW MAMA SEW


Dollies and Teddies Carrycot


I have written this FREE TUTORIAL ( The 'Sew Mama Sew' web page no longer exists so all links are broken ) 
You can buy this pattern in my Etsy shop Dolls Carrycot


 With Granddaughters in mind It was a labour of love and how they do love them.


Do check out this how-to tutorial, its a simple step by step project that makes this really lovely Carrycot that will be treasured by any little one. 


Tucked snugly in are two of my toys 'Saxon Bear' and 'Leah Honey' Dolly.


Happy sewing
Glenis

Wednesday, 22 July 2015

SAXON the Polar-Fleece Bear


SAXON BEAR


This little dressed bear is my latest pattern, sweet and cuddly in his little cuffed Overalls.
I have so loved making him, choosing all the fabrics so that each one is sweeter than the next.


I love to mix cotton patterned fabric with fleece, so that he looks all dressed up.


I have named this Bear 'SAXON' after my only Grandson who is six and still loves a cuddle.


The cutting process, choosing fabric, what goes with what, I love this stage.


The little overalls all ready for the buttons and domes.


The faces all embroidered, each one slightly different which is the wonder of hand crafted.


All lined up like little solders waiting for their arms.


See how using fabric creates built in clothes.


All the overalls pressed and they are dressed, ready for a good home.


They really are cute don't you think?

SAXON BEAR PATTERN


Happy sewing
Glenis

Tuesday, 7 July 2015

Fashion for Girls 'Sweet Pinafore and Blouse'


Fashion for little ones  'Girls and their dresses'

You know how I love detail well this little outfit has it all, piping( I love), top stitching, frills, spotted buttons, floral's, stripes, soft cotton and of course its blue.


You would think with all this going on it would be overdone, it isn't because not one detail is more dominant than the others.  You can see I have also used three different fabrics in the pinafore but they are soft and once again of equal depth of colour.


The little white blouse does its job of keeping it ( quiet ), its a word I often use to describe a feeling.


  I have piped the blouse with the blue and white stripe, very fine as is also the cotton fabric I have used to make the blouse.


A little label
 on the back adds the detail that is my style.


Its a bit big for Kerah but maybe this summer.
Happy sewing 
Glenis


Sunday, 14 June 2015

Padded Coat Hanger

Padded Coat Hanger Tutorial


I have been making these coat hangers to give as gifts, and they really are simply quite lovely.


You will need 1/4 metre or yard of fabric

1/4 metre or yard of light quilters batting or needle punch batting

A wooden coat hanger

Piping, purchased or make your own using coordinating fabric

A small quantity of narrow ribbon.


This is my pattern for you, print it out actual size A4 paper. I di have this patten on 'Craftsy' as A PDF but they have closed my shop.
I purchased adult wooden hangers as I couldn't get child's and we cut the ends off to make a 11.5" or 29cm hanger.


Measure the pattern pieces against the coat hanger as these can be varying lengths you may need to make it shorter than my pattern. Cut 4 Ends from your fabric  Cut 4 Ends from your batting


Using 1/4 " seam sew the batting onto the back of all your end pieces, remembering to flip your pattern so you have two lefts and two rights.


Pin your piping on to one left and one right end piece, clip piping to follow the curved end. Sew in place using just over 1/4" seam, start  your piping at the fold line, [see photo above] remembering your fold line might be different from my pattern.


Lay the piped end on top of other end right sides facing, pin then sew leaving base open for turning. If you do it this way you can follow the stitching lines


Clip curves up to your stitching line then turn through, I use a chop stick as it has a blunt end it won't poke through your work [no scissors].


At this stage I give my work a press then fold under the ends and slide onto the hanger


Slip stitch the two ends together and secure threads with a hidden knot to finish off.


You can see I have used different fabric at the back of my hanger to coordinate with my little dress see   HERE 


Using satin ribbon tie around to hide the join and finish off with a bow. 


They are a lovely addition to any wardrobe, and if you match it to any outfit, just gorgeous!!

Happy Sewing

Glenis


Detail, Detail, how to take your sewing to the next level.

The Detail says it all!!

I have said before that building detail into your work creates quality, it lifts it up to the garment that demands---

 ' WHERE DID YOU GET THAT GORGEOUS DRESS'


This was the fabric that caught my eye with the whimsical Ballerina's on it and a soft cream background. The coordinating border fabric I could see around the hem.
The blue spot and embroidery thread was for another project but somehow during the trip home they formed into a gorgeous dress.


Look at these little dancers, almost Angel like with the little stars.


The embroidery thread is ever so softly variegated 


My little trial just with a simple double French Knot over the top of the printed flowers.


It was at this stage that I decided to use the blue spot as a trim, to lift the colour and give it a fresh look. 


The pattern that I used was a basic dress with a waist, I added the embroidered band with the spot trim. 


I have added the blue trim to the bottom border.


From the border fabric I made the ties which I always love, they draw the waist in to accentuate the full skirt.


I have piped the neck and arm holes, I do love piping and use it often.


The finished dress which I'm so pleased with, in all honesty the photo's don't do it justice.


The back of the dress with the ties, details add interest and they will take your garment from homemade to 'Couture' every time.


I have lined it all with fine cream lawn and added a little lace edge to the hem, I think I'm finished.


The coat hanger made to match you can get the pattern and instructions   HERE 

I got the fabric from my local shop here in Gisborne, although I got the last of the blue.
Its Anna Griffin's Believe Collection FAIRY TOSS BLUE


Friday, 12 June 2015

PDF sewing pattern 'SWEET ARIA' Dolly

'Sweet Aria' Dolly PDF sewing Pattern

This is my latest little toy, a sweet dolly named for my wonderful Granddaughter 'Aria Syrah'  [I have four Granddaughters and one grandson].
I love to sew and design and I am definitely a detail person.
I found this blue and fawn fabric and the coordinating spot and could see a little doll made from it.


I think the key to cuteness is in the face, I have kept the features simple with round black felt eyes, just a touch of white will give a sparkle.


The little pinafore is really quite simple don't be afraid to have a go at sewing it, I have sewn domes to fasten the back but you could use Velcro if you wish.
The cream lace just finishes it off, I never buy pre-gathered cotton lace as it often so stiff the garment won't hang right.


The little boots have tiny pale blue buttons to set them off.
 Details, Details they build to create the look that I do.


The felt flower just finishes the hat off don't you think.

I work incredibly hard to make my patterns achievable for the average sewer, thinking through the steps to keep it simple.

PATTERNS are available at my Etsy shop and also now on CRAFTSY,    $8.00 US