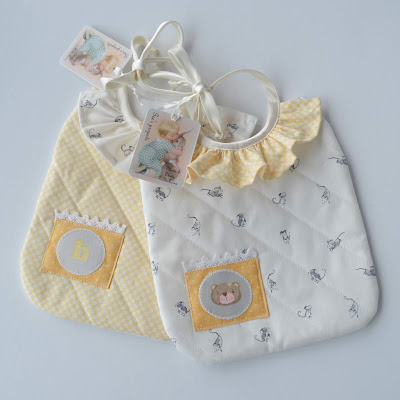
Simple...A Baby's Bib sewing pattern
I like to sometimes have simple projects that can be quickly made and these Bibs are one of them. I make several at once, spend an hour or two and you can make probably six.
Two contrasting fabrics and backed with cotton Waffle easy and almost completely bagged out making such a quick project.
I bind the neck with bought bias tape leaving long ends to form the ties. No Velcro to tangle and catch in baby's hair or in their clothes, just old fashioned and simple.
Having the two contrasting fabrics on the front makes for sweet looking bibs and fabric friendly.
Join the bib front and bottoms together, press open the seams and top stitch.
I back them with cotton waffle it washes well and is absorbent enough to catch all the dribbles.
Place the waffle back bib over the front with right sides facing and sew around the stitching line as shown on your pattern piece, clip the corners, turn through and press.
Cut a piece of the bias tape 25'' in length, position the middle of the tape on the centre of the neck edge.
Pin then sew carefully so you catch the back of the tape, continue to stitch through to the ends of the bias to create the ties, I tie a little knot at the ends of the bias tape.
See just as neat on the reverse.
I have added a little ribbon tag to create detail but there are endless possibilities, frills, lace, ricrac etc.
Over the years I have made dozens of these bibs, simple yes and sweet.
Copy the pattern pieces page 1 and 2 and print out on A4 paper, I have put an inch square so you can get your sizing right although it won't matter if they are a little smaller.
Happy sewing
Glenis


