Showing posts with label free tutorial. Show all posts

Sunday, 29 November 2020

Ten great tips for sewing beautiful soft toys


Hints and help for creating beautiful and robust soft toys and dolls


soft toy, doll with doll's quilt
'Poppy dolly' all ready for Christmas.


I love to sew for children and one of these loves is of course toys. 
I am hoping that these practical hints will give you the confidence to get started.

Soft toy ,linen rabbit floppy ears


Tip 1. Preparing your fabric.....Press and starch, in my opinion starching is a must, the fabric is wrinkle free, crisp and easy to cut especially little pieces.
 
Tip 2. Fabric 'straight of grain'.....Please follow the straight of grain references on the pattern pieces and cutting instructions.
Cotton, linen and all other woven fabrics have a 'straight of grain' which is in the direction of the weft threads.
The weft threads run parallel to the selvedges and the warp threads run across the width of the fabric. The weft threads are stronger and more stable while the warp threads add more give to the fabric. I often use Minky (velour)and fleece fabric in my toys and they too have a greater stretch across the width of the fabric so the same rule applies.

Tip 3. Accurate cutting.....It's so important to cut these small pattern pieces exactly on the lines because any deviations can completely change the shape of a foot or little face etc.

Tip 4. Stitch length....Set your machine to a small stitch I set mine to 2, this keeps the seams firm and robust enough to hold the stuffing in and cope with loving  handling.

Tip 5. Back stitch....Reinforce the beginning and ends of every seam with back stitch, it will prevent the seams unraveling while constructing and stuffing the toy.

Tip 6. Seam allowance....If the pattern states 1/4 '' seams please stick to this or the feet won't fit the end of the legs, the collar won't fit the jacket etc. Most toy and craft patterns including mine have 1/4 '' seams unless otherwise stated.

Tip 7. Construction.... Read the pattern through first as it really gives you a feel for your project then follow the sequence as laid out in your pattern 'step by step' guide. Most pattern designers have worked hard to achieve the best way to construct the toy.

Tip 8. Curves and clipping seams....You can't make a doll or a rabbit without dealing with sewing curves, the secret is to take your time and have your machine needle set in the down position so you can lift the foot and pivot carefully around the curves. Don't stretch the fabric just guide as you stitch. Clip curves carefully but not to close to the stitches. 
Where the head meets the neck is the trickiest part so clip carefully but not through the stitching line...this is why back-stitching at the beginning and ends of each seam is so important.

Tip 9. Stuffing....I always use cushion inners for my stuffing, the stuffing is hypoallergenic and has a much softer feel than specific toy stuffing. You can buy cushion inners at most household linen type shops. 
Tease out the stuffing and push in small amounts at a time. Push the stuffing up into the head first and manipulate it to get the desired shape, the neck needs to be quite firm to hold the head and then stuff the rest of the toy.

Tip 10. Finishing and hand sewing....Once the stuffing is done close up the openings with very small and close together stitches, ladder or slip stitch is best hide your knots and ends inside the toy. 
Embroidering the face is pretty simple but it is the key to a cute look so take your time, you can mark the face details with a fade away pen if this helps. I use simple stitches like back stitch, satin stitch and sometimes French knots for freckles.
If I add blush to a doll I use pink craft ink dabbing it on with a cotton wool ball. Please practice on a scrap of fabric first to get a light look... just a hint of pink, if you are heavy handed it can mean disaster. 😕


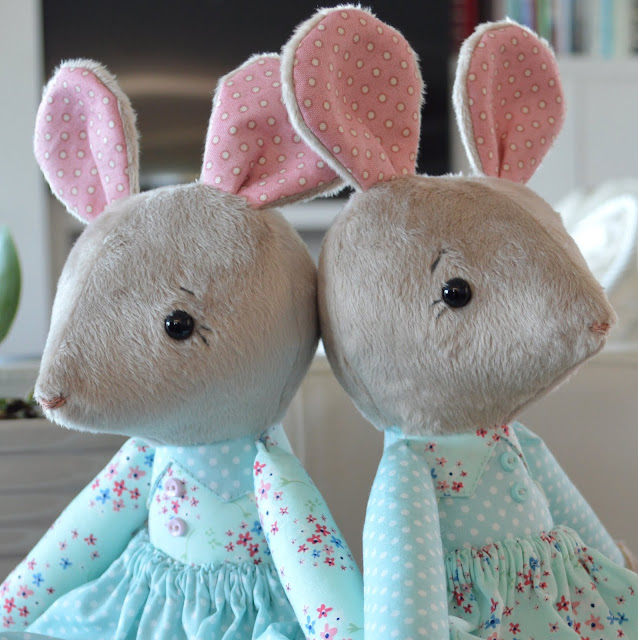
soft toy, fluffy mouse doll very cute
'Miss Country Mouse' one of my favourites.


I haven't dealt with sewing the dolls clothing in my ten tips but all the above principles apply, precise cutting, seam allowance, backstitching and neat finishing off.


soft toy, linen rabbit with clothes
Adding the cute look to 'My friend Molly' bunny.


dressed doll, linen rabbit sewn toy
'My friend Molly' dressed bunny 


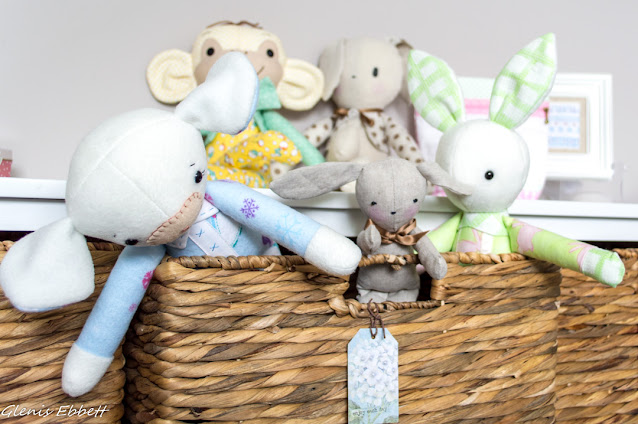
Soft toys, plushies in a basket
A basketful of delightful toys.

Soft toy, gee's projects patterns
All the joy captured in that sweet face.

Dressed doll in pink, very cute
Poppy dolly.

soft toy, embroidering the face
Sewing the face details 'Kerah Rabbit'.


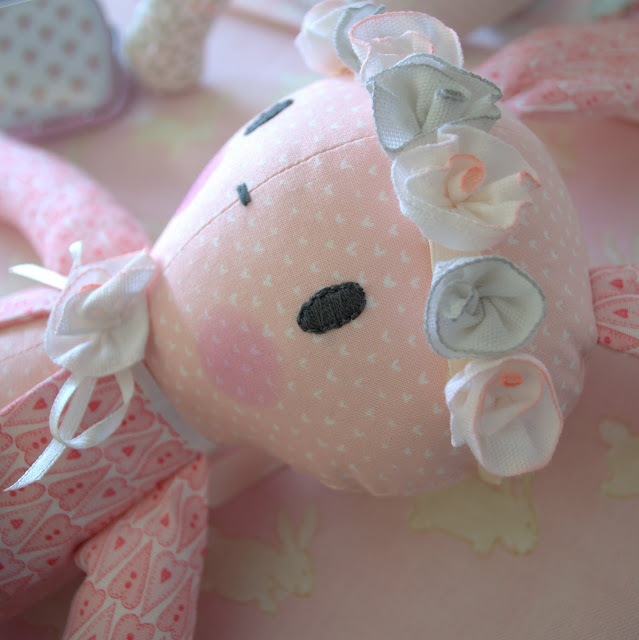
soft toy bunny with a halo of flowers
'Bobby Bunny' with her halo of flowers.


These are just a few of my patterns that are available in my Etsy shop , I do try very hard to make them easy to follow, lots of 'how to' photos and 'step by step' instructions.
Hopefully you will practice these simple tips to get that professional look and the joy of creating.

Happy Sewing


Glenis


Wednesday, 17 June 2020

'Heart' applique and embroidery fabric coasters and Place mat ... free pattern

'Heart' fabric coasters and place mat...free tutorial


 There is a huge amount of work in producing a pattern so when you the buyer purchases it all the work, the measurements, and thinking are done for you.
I buy patterns even though I know I probably could work it all out for myself...but I don't want to and because it's good to support other crafty women like me and I want to try something new.
But what I'm noticing is that most of the instructions include diagrams to follow rather than pics.
So...I have been teaching myself graphics to help with my pattern making business. I generally take multitudes of photos to help with my step by step instructions... but sometimes the photos are blurred ( a bit like some of my photos here ) or the light is wrong and then you need to start from the beginning again...very frustrating.
I've written this tutorial so you can make these sweet coasters and place-mats but the template and text can be used in many other projects like my fussy cut purse, so I hope you enjoy and take the time to make something from it.
 If I could put a free pattern on Etsy I would but it doesn't work and I don't have the knowledge to put a downloadable file for this tutorial here but if you click on each numbered page below and save image and download them they will be true to size.
Happy sewing
Glenis


Sunday, 15 September 2019

Sew a gorgeous baby's bib..free pattern

Sewing bibs

One of the most appreciated gifts for a new mum other than a helping hand is a bundle of bibs. I have made quite a few in my time as a seamstress Grandmother of nine...almost ten and you know I really love making them.
This pattern I'm sharing is similar to my original pattern but with a snap fastener rather than a tie.


At the bottom of this post you will find the templates for this bib, Just copy them they are jpeg ...print out on A4 paper.


You can keep this bib simple or as glamed up as you like. You can check out other bib tutorials I've made HERE and pics HERE.
I have used some sweet floral and stripe just left over fabric from other projects, a lace trim, a little me made patch and quilting detail.


Cut out your upper and lower front pieces, add lace if you want and place the lower piece on top of the upper piece right sides together and straight edges aligned, stitch together using just over a quarter inch seam.


Pin together the upper and lower pattern pieces lining up the dotted lines..see photo above. Use this pinned together template to cut the backing fabric and the batting. (Just a note this bib doesn't need to be quilted and can just be backed with terry toweling or any absorbent fabric, but if you quilt it the quilting process makes the bib smaller and so you might like place the quilted bib front on the backing fabric and use that as your template.)
I used a fusible batting but a lightweight cotton batting would be equally as good.
Press the seams up and the lace down on the front bib and using a cover cloth press the batting in place on the wrong side of the bib.
At this stage I have quilted my front in a diagonal grid about 1 '' apart. I recommend using a walking foot to get the best job.


Trim the threads and if you want to add a little patch or label now's the time.


To assemble the bib place the back piece on top of the front piece RST and stitch around the edges using a small seam, leave a 3'' gap on one side of the bib for turning through. Trim the seams where necessary and clip carefully at the curves.  Use a chop stick or similar to turn through, push out all the edges with your implement to get a nice shape and all your curves smooth. Press well and hand stitch or fabric glue up the opening. Add a snap fastener or small Velcro circles to close your bib...all finished.


 Happy sewing everyone.

Glenis

Monday, 21 August 2017

Embroidered bunny pincushion tutorial


Embroidered Pincushion tutorial

I do love to do simple embroidery, small projects that are quick and oh so cute.
I've had such a lot of fun using this simple bunny to embellish my work, pincushions, pocket detail and whatever really, so I thought I'd share it with you.


Cut one 7'' square of white or cream fabric, cotton or linen, either will be lovely. Transfer the design onto the fabric making sure you centre it, I find it easier to just trace my design with a soft pencil, but use the method you prefer.
Cut one 7'' square of lightweight fusible batting and press it onto the back of your work after you have transferred the design.
 Using an embroidery hoop to hold your fabric embroider the outline of the bunny using two strands of DMC embroidery floss. The eye is done with a French knot and the nose just a small straight stitch. To do the tail just use a series of bullion stitches, now these don't have to be perfect to create a good look just as long as they look like a fluffy tail.
The leaves and flowers are done using lazy daisy stitch and just one strand of DMC thread.


To make up the pincushion 

Trim your embroidery to a 5 1/2 '' square making sure you have the embroidery exactly in the centre.
Back: cut one patterned fabric  5 1/2''  square
(Peeps) Small borders: cut four 1 1/4'' x 5 1/2'' from patterned fabric
Larger borders: cut four 1 1/2'' x 5 1/2'' from contrasting fabric


Fold the small borders or peeps as I call them in half lengthwise and press, position the top and bottom peeps 1 3/8'' from the top and bottom raw edges of your embroidered front. At this stage before attaching these you can add a trim, it can be lace or ric rac etc, stitch it in place so that the folded edge of the peep will cover it.


 Having the folded edge toward the centre and the raw edge toward the outer....stitch the top and bottom peeps in place using a 1/4 inch seam.


Now attach the two side borders using the same technique. 


Place the outer border right side facing down on top of the first border 'Peep'
lining up the seams and stitch  in place using a quarter inch seam, press open.


Stitch the top and bottom borders in place using the same method, press open and at this stage you may have to trim the edges slightly to bring it back to the original 5.1/2 inch square.


Place your front face down on the back piece and using a quarter inch seam neatly sew the two together leaving a two and a half inch opening for turning.


Trim the corners carefully, turn through and stuff with fleece.


Using a slip stitch sew the opening closed, you can see I've added a little decorative tag just to finish the look.


Below is my hand drawn rabbit image, print it out on A4 and use to create something sweet.


Happy sewing 
Glenis


Related Posts Plugin for WordPress, Blogger...